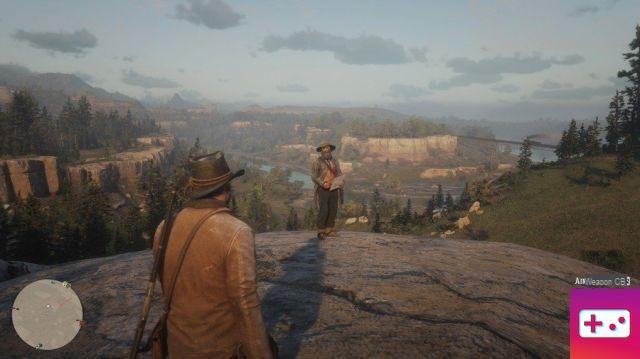
Can you improve control in Red Dead Redemption 2? Is there a way to make aiming in RDR2 more responsive? The game's often clunky controls have been a sticking point for many players, but after spending over 100 hours with the open world title, we've found some surprisingly effective ways to improve the way the game actually plays, including during the fights.
In this guide, we'll go over Red Dead Redemption 2's control settings and detail every step you can take to make the game more responsive.
How to Improve Red Dead Redemption 2 Controls
Red Dead Redemption 2's controls offer plenty of options that you can tweak to your liking. Granted, not all of them make a huge difference, but you can definitely make the game feel more like a more responsive shooter by adjusting various settings.
Red Dead Redemption 2 Aim Settings
At the top of the Red Dead Redemption 2 control options menu is the Targeting section. Changing these settings essentially toggles between auto-aim and free-aim.
Automatic sighting lets you lock on targets immediately when you hold L2 to aim and generally makes the game easier.
aim for free gives you more control over your aim and is better suited for players who want to test their skills.
Now let's go through each option in the targeting section.
- Lock-On Mode (on foot) – This determines the aiming system you use when walking. Your options are Normal, Narrow, Wide, and Free Aim. Ordinary gives you a moderate amount of auto-aim and targets enemies close to where you're trying to aim. This presents the most balanced way to play. Narrow provides auto-aiming that targets enemies that are right in front of you and not too far to either side. Large can target any enemy displayed on the screen and simplify the game overall. free goal disables any immediate automatic aiming. We recommend using the setting you are most comfortable with.
- Aim Assist Force (walk) – This setting determines the strength of your auto aim. The higher the bar, the more the game will choose a target for you. At full, the game still locks you onto a target when you hold L2.
- Lock mode (mount / vehicle) – This is the same as setting on foot, except it only applies when riding a horse, wagon, boat or train.
- Aim Assist Force (assembly / vehicle) – Again, as on foot, except this only applies when riding a horse, cart, boat, or train.
All of the above settings depend on how you want to play. If you don't want to worry too much about combat, or just want to make it easier, try Normal or Wide Lock-on, then set Aim Assist appropriately.
If you want a balanced combination of aim assist and free aim, we recommend going for Normal and setting combat assist to about halfway. This setting means that you will always have to aim, but the game will help you by keeping your crosshairs close to your target.
If you want to avoid auto-aim altogether, set it to Free Aim and turn off aim assist power completely. If you do that, we highly recommend that you read the rest of this guide, as we'll go into great detail on how to make the free viewfinder more responsive.
Red Dead Redemption 2 Controls - How To Make Aiming More Responsive
To make the lens in Red Dead Redemption 2 more responsive, check out the Third Person and First Person sections of the controls menu, depending on which camera you like to use.
The options included in these sections determine the level of responsiveness of the shot in general and, in our opinion, the default settings are not very good.
Here are the options you should tweak if you want to feel more responsive in Red Dead Redemption 2:
- Look Sensitivity – This setting determines how fast the camera rotates when you move the right analog stick. If the bar is halfway or below, you will find that looking around has a weight to it which can make the game feel a little heavy. For the best experience, we recommend setting it above halfway two or three notches. Set it too high, however, and you'll likely find the camera moving way too fast.
- Lens Sensitivity – Much like Gaze Sensitivity, this setting determines how quickly you can move your crosshairs when holding down L2 to aim. And again, like Look Sensitivity, you'll want it to be above half-half to make sure everything is smooth and not smooth. For this one, we recommend setting it above half by one, two, or three notches. If you go too high, you'll probably have a hard time keeping your crosshairs on your targets because it will move too fast.
- Aim/Gaze Acceleration – This is where things get interesting. This setting determines how long it takes for the camera or aiming speed to reach its fastest point. If this bar is low, you'll find that your camera moves very slowly before hitting a decent speed and staying there. As such, we recommend keeping this bar near the top. That said, you might find precise aiming a bit more difficult with this set at max. Try lowering the bar a few notches from the top for aiming, which gives you a tiny bit of leverage, but not enough to make it seem slow.
- Aim/look dead zone – This is now the most important setting to make Red Dead Redemption 2 feel more responsive. By default, this setting is set to half and is the main factor in making you feel sluggish. If you want your aim to be as smooth as possible, we honestly recommend turning it off completely by lowering the bar all the way. This makes aiming much more precise as it forces it to more accurately reflect the movement of your right analog stick.
In summary, we've found that turning off the Aim/Look Dead Zone setting is a must if you want the smoothest and most responsive aiming in Red Dead Redemption 2. Add to that a Speed/ Look high and you should find that goal. , especially free aiming, is much more accurate and much slower. Applying these options can make a noticeable difference whether you are using Third Person View or First Person View.
Add auto-aim options to suit your playstyle, and you'll find objectives in Red Dead Redemption 2 feel more responsive and dynamic.
For reference, here's what our control settings look like after 100 hours of play (feel free to copy them):